Laravel 8 phone or mobile number OTP verification using firebase. In this tutorial, you will learn how to use firebase otp authentication for mobile or phone in laravel 8 app.
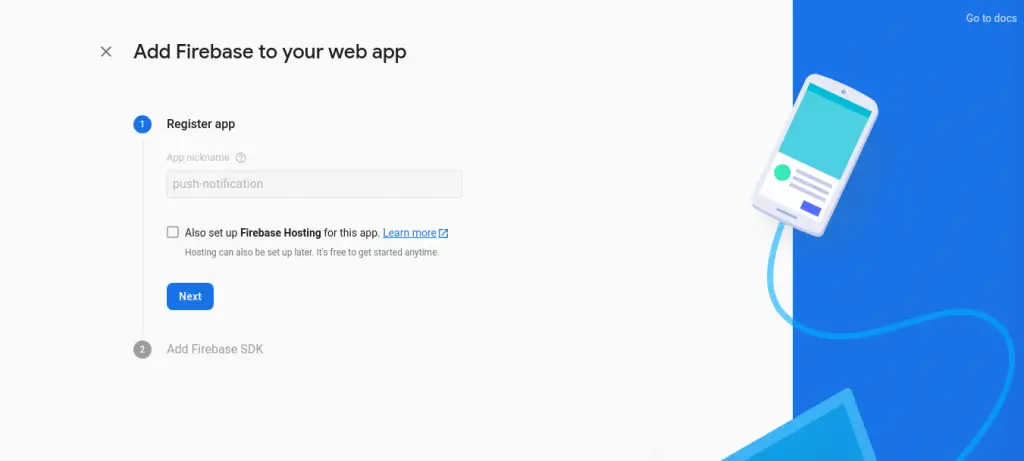
first of all, you need to visit Firebase Console and create a project. then you have to create web app on that project as like below screenshot:
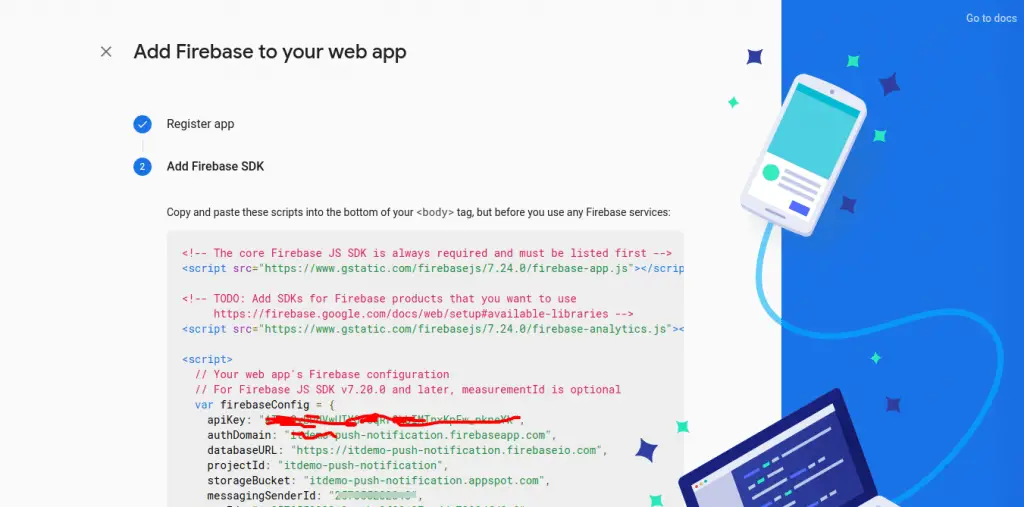
After given name and next then you will received firebase sdk as like bellow screen shot:
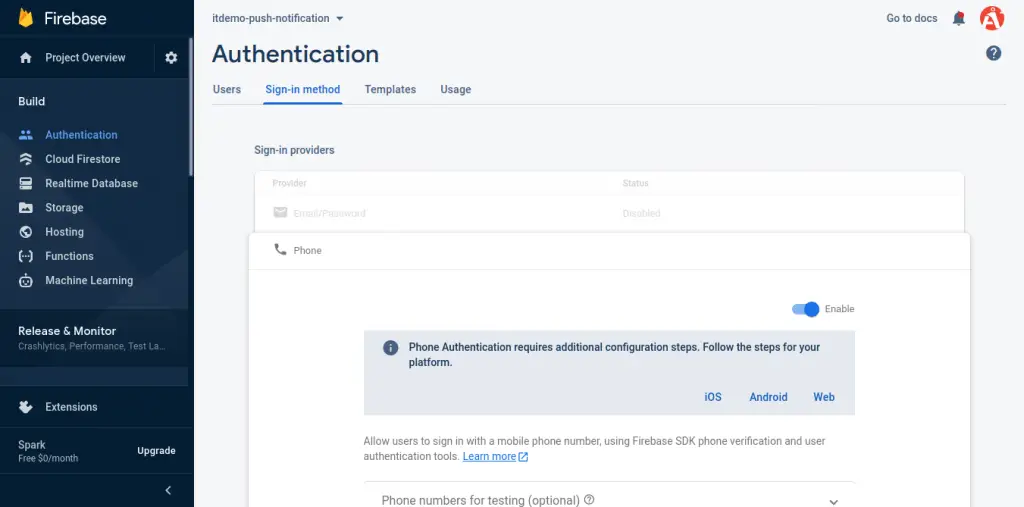
Next you need to enable phone number auth from bellow link:
You have to save that all information because we will use in our app.
Laravel 8 Firebase Phone Number OTP Authentication Tutorial
- Step 1 – Download Laravel 8 Application
- Step 2 – Connecting App to Database
- Step 3 – Create View
- Step 4 – Create Route
- Step 5 – Create Controller By Artisan Command
- Step 6 – Run Development Server
Step 1 – Download Laravel 8 Application
First of all download or install laravel 8 new setup. So, open terminal and type the following command to install new laravel 8 app into your machine:
composer create-project --prefer-dist laravel/laravel blog
Step 2 – Connecting App to Database
In this step, setup database with your downloded/installed laravel 8 app. So, you need to find .env file and setup database details as following:
DB_CONNECTION=mysql
DB_HOST=127.0.0.1
DB_PORT=3306
DB_DATABASE=database-name
DB_USERNAME=database-user-name
DB_PASSWORD=database-password
Step 3 – Create View
In this step, visit resources/views directory and create one blade view file named index.blade.php. And then add the following code into it:
<html>
<head>
    <title>Laravel 8 Phone Number Authentication using Firebase - Tutsmake.com</title>
    <!-- CSS only -->
    <link href="https://cdn.jsdelivr.net/npm/[email protected]/dist/css/bootstrap.min.css" rel="stylesheet">
    <script src="https://cdnjs.cloudflare.com/ajax/libs/jquery/3.6.0/jquery.min.js"></script>
</head>
<body>

<div class="container">
    <h1>Laravel 8 Phone Number Authentication using Firebase - Tutsmake.com</h1>

    <div class="alert alert-danger" id="error" style="display: none;"></div>

    <div class="card">
      <div class="card-header">
        Enter Phone Number
      </div>
      <div class="card-body">

        <div class="alert alert-success" id="sentSuccess" style="display: none;"></div>

        <form>
            <label>Phone Number:</label>
            <input type="text" id="number" class="form-control" placeholder="+91********">
            <div id="recaptcha-container"></div>
            <button type="button" class="btn btn-success" onclick="phoneSendAuth();">SendCode</button>
        </form>
      </div>
    </div>

    <div class="card" style="margin-top: 10px">
      <div class="card-header">
        Enter Verification code
      </div>
      <div class="card-body">

        <div class="alert alert-success" id="successRegsiter" style="display: none;"></div>

        <form>
            <input type="text" id="verificationCode" class="form-control" placeholder="Enter verification code">
            <button type="button" class="btn btn-success" onclick="codeverify();">Verify code</button>

        </form>
      </div>
    </div>

</div>

<script src="https://www.gstatic.com/firebasejs/6.0.2/firebase.js"></script>

<script>

  var firebaseConfig = {
    apiKey: "AIzaSyBPdVwUIYOY0qRr9kbIMTnxKpFw_nkneYk",
    authDomain: "itdemo-push-notification.firebaseapp.com",
    databaseURL: "https://itdemo-push-notification.firebaseio.com",
    projectId: "itdemo-push-notification",
    storageBucket: "itdemo-push-notification.appspot.com",
    messagingSenderId: "257055232313",
    appId: "1:257055232313:web:3f09127acdda7298dfd8e8",
    measurementId: "G-VMJ68DFLXL"
  };

  firebase.initializeApp(firebaseConfig);
</script>

<script type="text/javascript">

    window.onload=function () {
      render();
    };

    function render() {
        window.recaptchaVerifier=new firebase.auth.RecaptchaVerifier('recaptcha-container');
        recaptchaVerifier.render();
    }

    function phoneSendAuth() {

        var number = $("#number").val();

        firebase.auth().signInWithPhoneNumber(number,window.recaptchaVerifier).then(function (confirmationResult) {

            window.confirmationResult=confirmationResult;
            coderesult=confirmationResult;
            console.log(coderesult);

            $("#sentSuccess").text("Message Sent Successfully.");
            $("#sentSuccess").show();

        }).catch(function (error) {
            $("#error").text(error.message);
            $("#error").show();
        });

    }

    function codeverify() {

        var code = $("#verificationCode").val();

        coderesult.confirm(code).then(function (result) {
            var user=result.user;
            console.log(user);

            $("#successRegsiter").text("you are register Successfully.");
            $("#successRegsiter").show();

        }).catch(function (error) {
            $("#error").text(error.message);
            $("#error").show();
        });
    }

</script>

</body>
</html>
Step 4 – Create Routes
In this step, open web.php file from routes direcotry. And update the following routes into web.php file:
<?php

use Illuminate\Support\Facades\Route;
use App\Http\Controllers\FirebaseController;

/*
|--------------------------------------------------------------------------
| Web Routes
|--------------------------------------------------------------------------
|
| Here is where you can register web routes for your application. These
| routes are loaded by the RouteServiceProvider within a group which
| contains the "web" middleware group. Now create something great!
|
*/

Route::get('firebase-phone-authentication', [FirebaseController::class, 'index']);
Step 5 – Create Controller By Artisan Command
In this step, run the following command on command prompt to create controller file:
php artisan make:controller FirebaseController
After that, go to app/http/controllers and open FirebaseController.php file. And update the following code into it:
<?php

namespace App\Http\Controllers;

use Illuminate\Http\Request;

class FirebaseController extends Controller
{
    /**
     * Write code on Method
     *
     * @return response()
     */
    public function index()
    {
        return view('index');
    }
}
Step 6 – Run Development Server
Finally, open command prompt and run the following command to start developement server:
php artisan serve
Then open your browser and hit the following url on it:
http://127.0.0.1:8000/firebase-phone-authentication