CodeIgniter 4 file image upload to aws s3 bucket with validation. In this tutorial, you will learn how to upload files to amazon aws s3 bucket folder using PHP codeigniter.
This tutorial will make file and image form. And this form should have an input field whose type will be a file. In this, you can select any file. After this, to validate this file on the server using validation rules. Then store/upload files to amazon aws s3 bucket using PHP codeigniter
Codeigniter Upload File to Amazon AWS S3 Bucket
- Step 1 – Download Codeigniter Latest
- Step 2 – Basic Configurations
- Step 3 – Create Amazon AWS S3 Bucket
- Step 4 – Install AWS S3 SDK
- Step 5 – Create Controller
- Step 6 – Create Views
- Step 7 – Start Development server
Step 1 – Download Codeigniter Project
In this step, you will download the latest version of Codeigniter 4, Go to this link https://codeigniter.com/download Download Codeigniter 4 fresh new setup and unzip the setup in your local system xampp/htdocs/ . And change the download folder name “demo”
Step 2 – Basic Configurations
Setup some basic configuration on the app/config/app.php file, so let’s go to application/config/config.php and open this file on text editor.
Set Base URL like this
public $baseURL = 'http://localhost:8080';
To
public $baseURL = 'http://localhost/demo/';
Step 3 – Create Amazon AWS S3 Bucket
Create amazon aws s3 bucket; so you need to create aws s3 bucket account by following the below given steps:
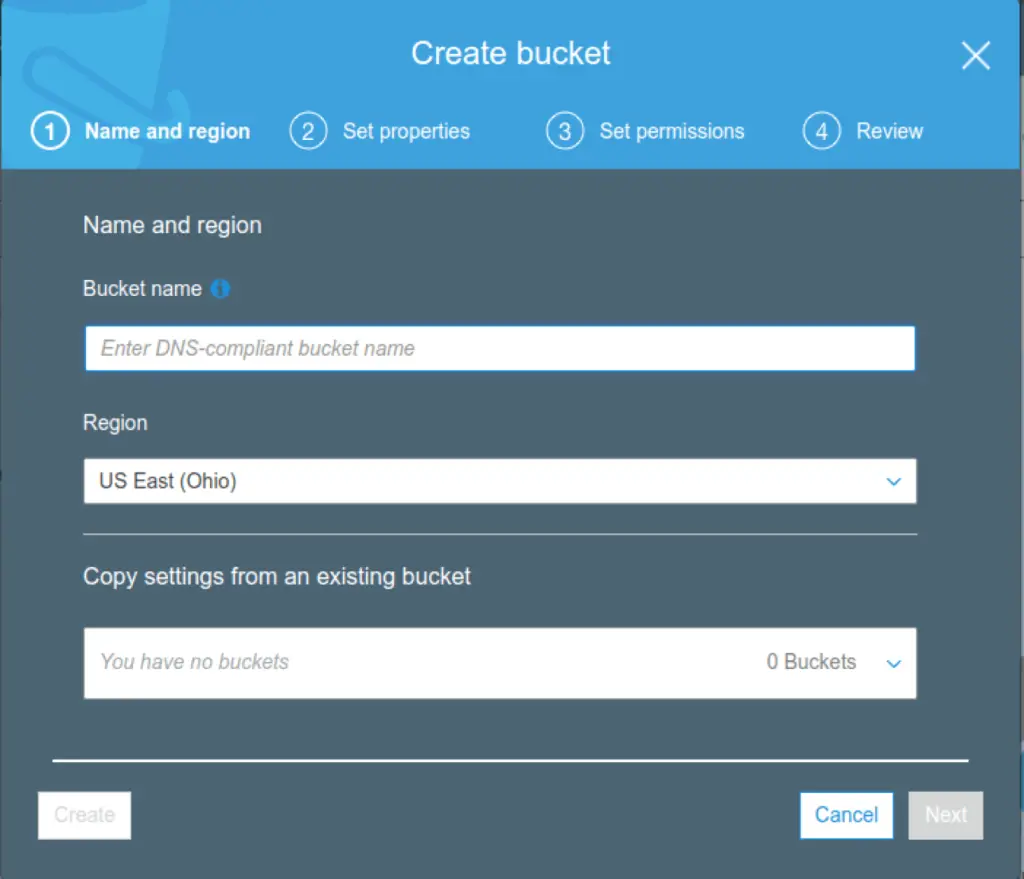
Setup amazon aws s3 bucket account; so you need to create account on amazon s3 to store our images/files. First, you need to sign up for Amazon.
You should follow this link to signup. After successfully signing you can create your bucket. You can see the below image for better understanding.
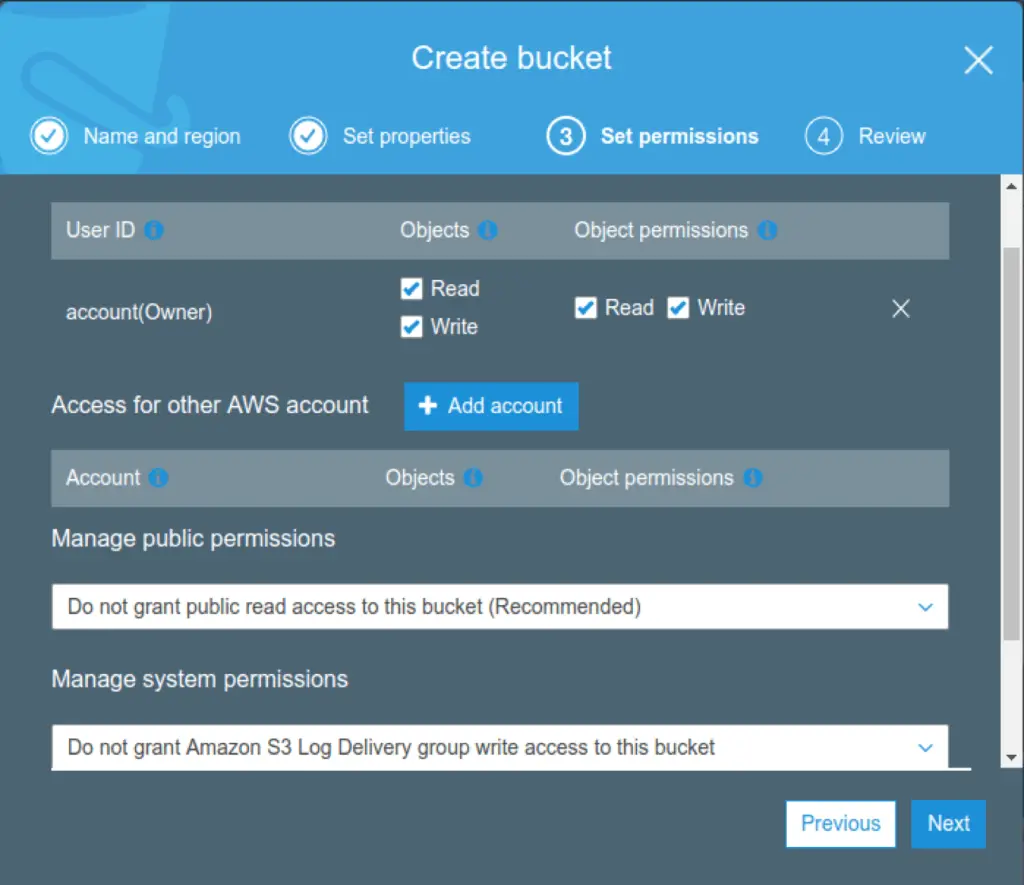
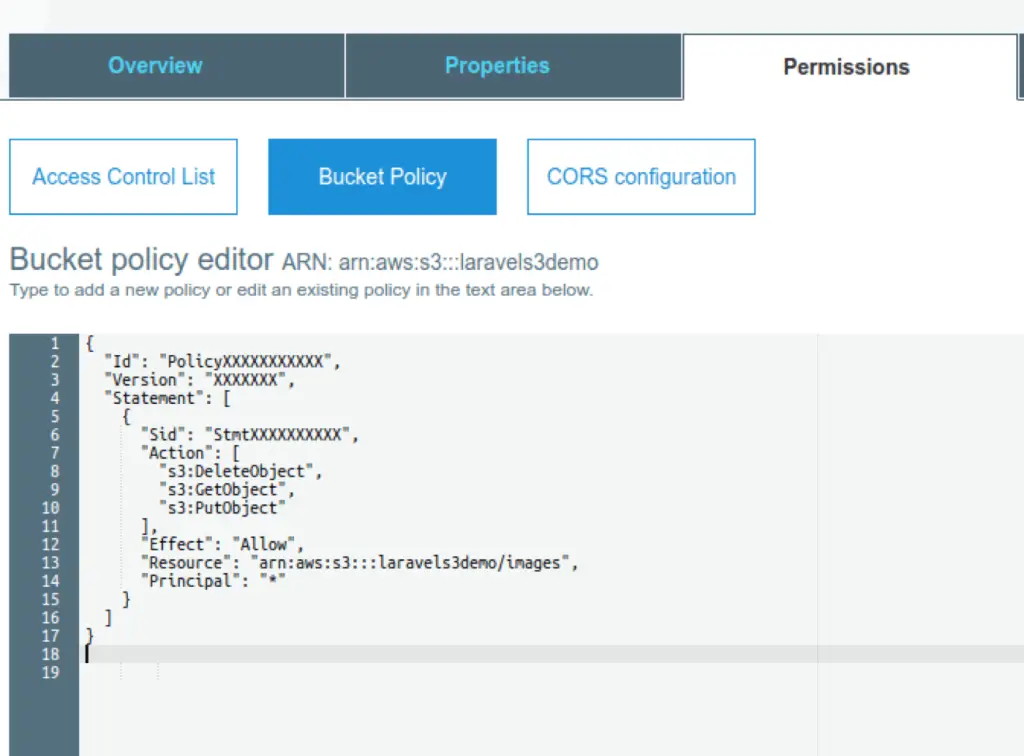
Now You need to create a bucket policy, so you need to go to this link. And the page looks like this.
You can see the page looks like this.
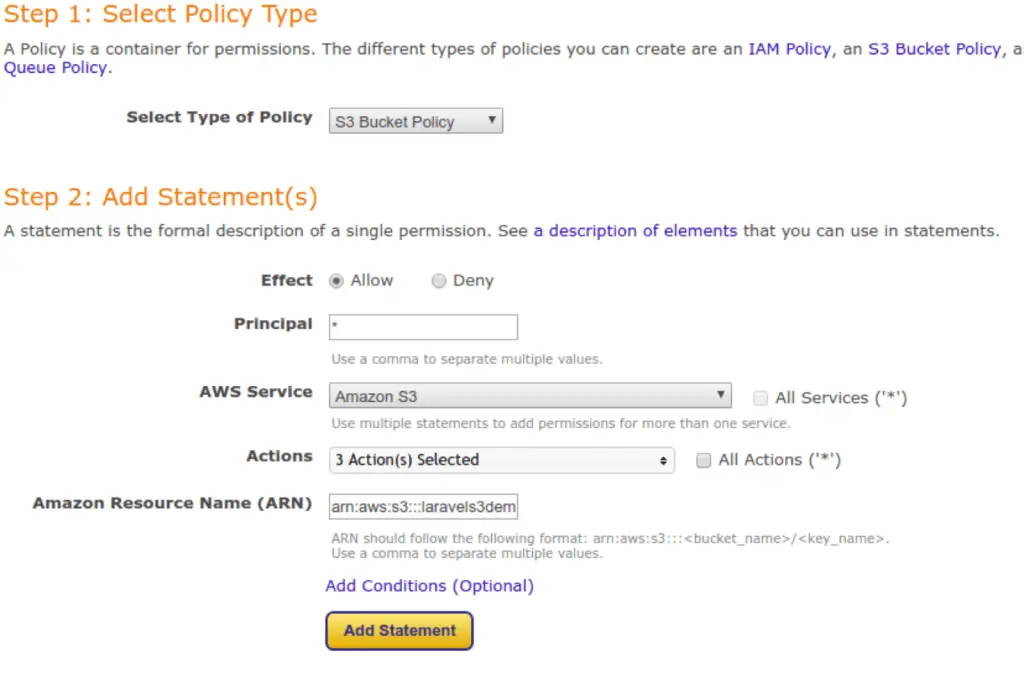
You have created a bucket policy, Then copy-paste into a bucket policy. You can see the below image.
Now you will go here to get our Access Key Id and Secret Access Key.
Step 4 – Install AWS S3 SDK
Execute the following command on the terminal to install aws s3 PHP SDK:
composer require aws/aws-sdk-php
Step 5 – Create Controller
Create Controller; So visit app/Controllers and create a controller name Form.php. In this controller, Create some method/function; as shown below
- Index() – This is used to display file/image upload form.
- Store() – This is used to validate form file/image on server-side and store into MySQL database and folder.
<?php namespace App\Controllers;

use CodeIgniter\Controller;

require 'vendor/autoload.php';

use Aws\S3\S3Client;

class Form extends Controller
{
    public function index()
    {
         return view('form');
    }

   public function store()
   {

	 helper(['form', 'url']);


        $validated = $this->validate([
            'file' => [
                'uploaded[file]',
                'mime_in[file,image/jpg,image/jpeg,image/gif,image/png]',
                'max_size[file,4096]',
            ],
        ]);

        $msg = 'Please select a valid file';

        if ($validated) {
            $avatar = $this->request->getFile('file');
            $avatar->move(WRITEPATH . 'uploads');

          $data = [

            'name' =>  $avatar->getClientName(),
            'type'  => $avatar->getClientMimeType()
          ];

          // Instantiate an Amazon S3 client.
          $s3Client = new S3Client([
              'version' => 'latest',
              'region'  => 'YOUR_AWS_REGION',
              'credentials' => [
                  'key'    => 'ACCESS_KEY_ID',
                  'secret' => 'SECRET_ACCESS_KEY'
              ]
          ]);

          $bucket = 'YOUR_BUCKET_NAME';
          $file_Path = __DIR__ . '/uploads/'. $filename;
          $key = basename($file_Path);

          try {
              $result = $s3Client->putObject([
                  'Bucket' => $bucket,
                  'Key'    => $key,
                  'Body'   => fopen($file_Path, 'r'),
                  'ACL'    => 'public-read', // make file 'public'
              ]);
            $msg = 'File has been uploaded';
          } catch (Aws\S3\Exception\S3Exception $e) {
              //$msg = 'File has been uploaded';
              echo $e->getMessage();
          }
          $msg = 'File has been uploaded';
        }

       return redirect()->to( base_url('public/index.php/form') )->with('msg', $msg);

	}
}
Important Note:- Please add your aws bucket key, secret, region and bucket name in the controller file.
Step 6 – Create Views
Create view for upload file; So visit application/views/ directory and inside this directory create form.php file. and update the following HTML into your files:
<!DOCTYPE html>
<html>
<head>
  <title>Codeigniter Upload File to Amazon AWS S3 Bucket - Tutsmake.com</title>
 <link rel="stylesheet" href="https://stackpath.bootstrapcdn.com/bootstrap/4.3.1/css/bootstrap.min.css">

</head>
<body>
 <div class="container">
    <br>

    <?php if (session('msg')) : ?>
        <div class="alert alert-info alert-dismissible">
            <?= session('msg') ?>
            <button type="button" class="close" data-dismiss="alert"><span>×</span></button>
        </div>
    <?php endif ?>

    <div class="row">
      <div class="col-md-9">
        <form action="<?php echo base_url('public/index.php/form/store');?>" name="ajax_form" id="ajax_form" method="post" accept-charset="utf-8" enctype="multipart/form-data">

          <div class="form-group">
            <label for="formGroupExampleInput">Name</label>
            <input type="file" name="file" class="form-control" id="file">
          </div>

          <div class="form-group">
           <button type="submit" id="send_form" class="btn btn-success">Submit</button>
          </div>

        </form>
      </div>

    </div>

</div>
</body>
</html>
This below line display error messages on your web page:
   <?php if (session('msg')) : ?>
        <div class="alert alert-info alert-dismissible">
            <?= session('msg') ?>
            <button type="button" class="close" data-dismiss="alert"><span>×</span></button>
        </div>
    <?php endif ?>
Step 7 – Start Development server
For start development server, Go to the browser and hit below the URL.
http://localhost/demo/public/index.php/form
Conclusion
CodeIgniter 4 file image upload to aws s3 bucket with validation. In this tutorial, you have learned how to upload files to amazon aws s3 bucket using PHP codeigniter.
Recommended Codeigniter Posts
If you have any questions or thoughts to share, use the comment form below to reach us.
How to upload large size video more than 200 mb