
How to Associate an Elastic IP address to your EC2 Instance in AWS; In this tutorial, we will learn how to allocate, associate and release Elastic IP address to your EC2 Instance in aws.
Once you create a new EC2 Instance. And then you will get a new public IP address from created instance. But this IP address is not dynamic. It will change or a new IP will get assigned to your instance when certain actions are made on your instance like restarting your instance.
If your public IP address is configured in your DNS A record, that particular IP address may change at any time. So when a new IP address is assigned to your example then your visitor cannot see your website because it points to the old IP address which you no longer control.
To overcome this issue of Elastic IP comes in which is a static IPv4 address designed for dynamic cloud computing. With the Elastic IP you can rapidly remap the address to any instance in your account.
Prerequisites
- A running EC2 Instance. Learn how to create an AWS EC2 instance.
How to Assign/Allocate an Elastic IP address to your EC2 Instance in AWS
In just 3 steps, you can assign or allocate an elastic ip address to ec2 instance in aws:
Step 1 – Create Elastic IP address
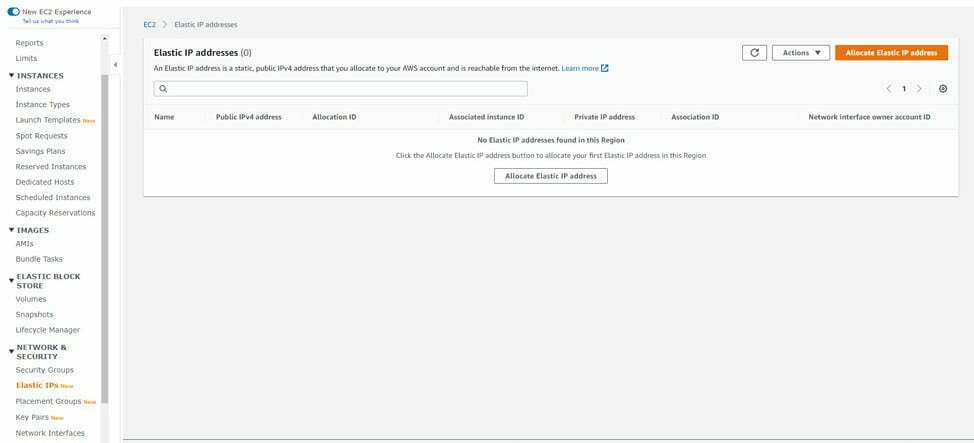
In this screen click Allocate Elastic IP address.

Now a new IPv4 address will get allocated.
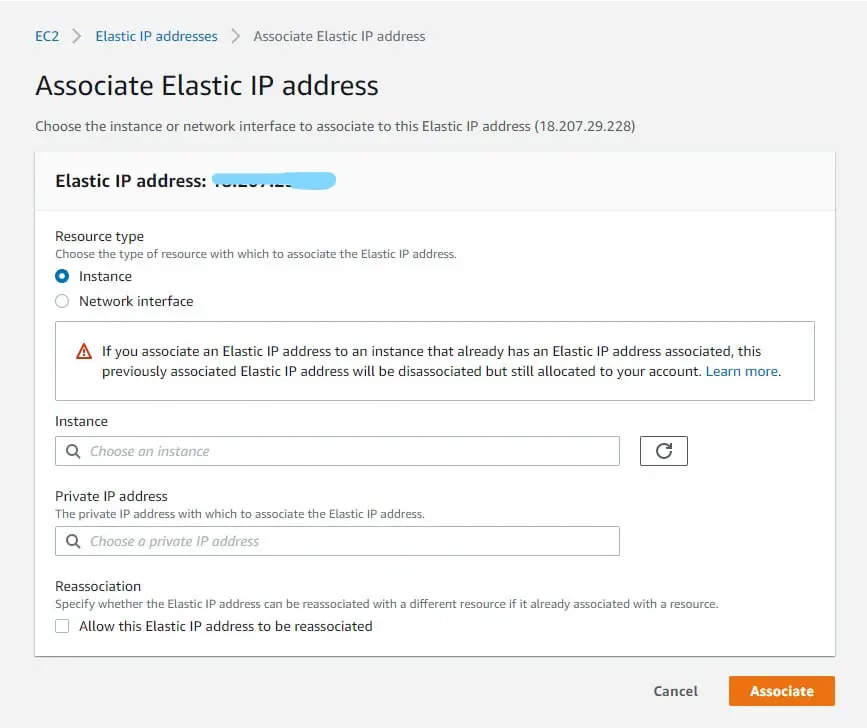
Step 2 – Associate Elastic IP address
Once an IP is allocated you need to associate it with the EC2 Instance.
To do so check the checkbox of your IP address and click Actions and choose Associate Elastic IP address.
If you have any other Elastic IP address assigned before and you need to re-associate you can enable the checkbox in Reassociation
Click Associate.
Step 3 – Release Elastic IP address
If you wish to no longer use the allocated IP address you can release it to prevent any unnecessary billings.
To do so check the checkbox of your IP address and click Actions and choose Release Elastic IP address.
Conclusion
How to Associate an Elastic IP address to your EC2 Instance in AWS. In this tutorial, we have learned how to allocate, associate and release Elastic IP address to your EC2 Instance in aws.
Recommended Ubuntu Posts
If you face any problem or any feedback, please leave a comment below.