Launch the ec2 instance in aws free step-by-step tutorial. In this post, we will show you how to create/launch ec2 instance with Linux in AWS free with pictures (images).
If you will follow this post at the end, you can create ec2 instance in aws within 5 minutes with linux.
How to Create EC2 Instance in AWS Free Step by Step
Steps to create/launch ec2 instance in aws free within 5 minutes:
- Step 1: Login to the aws console
- Step 2: Choose Launch Instance
- Step 3: Choose AMI
- Step 4: Choose EC2 Instance Types
- Step 5: Configure Instance Details
- Step 6: Add Storage of Ec2 Intance
- Step 7: Tag Instance of Ec2 Instance
- Step 8: Configure Security Groups
- Step 9: Review Instances
- Step 10: Create Key-Pair For Intance Access
- Step 11: Type Ec2 Instance Public Ip On Browser
Step 1: Login to the aws console
Use this link https://console.aws.amazon.com/ec2/ to login in your aws console account.
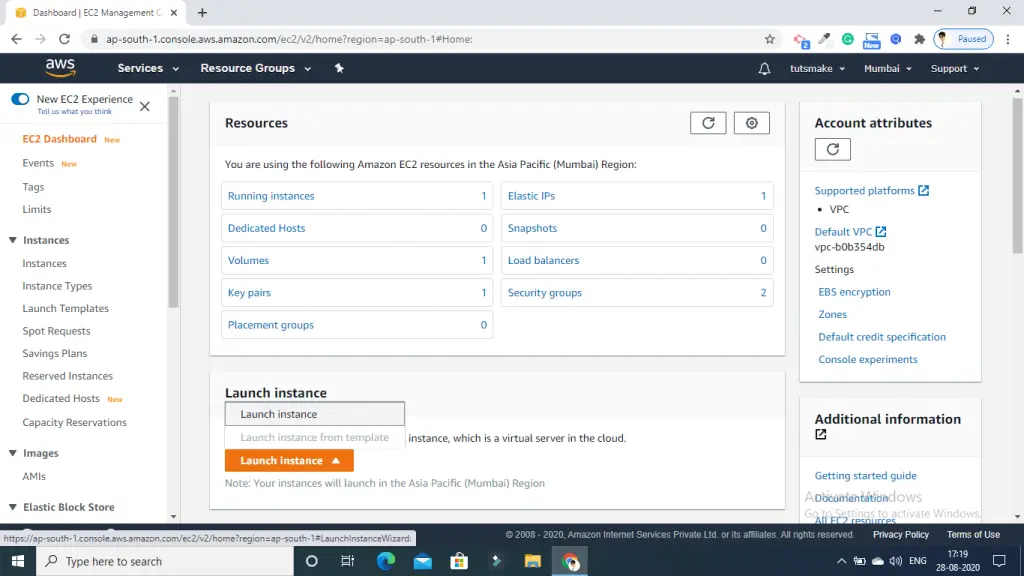
Step 2: Choose Launch Instance
First of all, Click on ‘Launch Instance’ button shows in the below picture for launch/create new ec2 intance in aws:
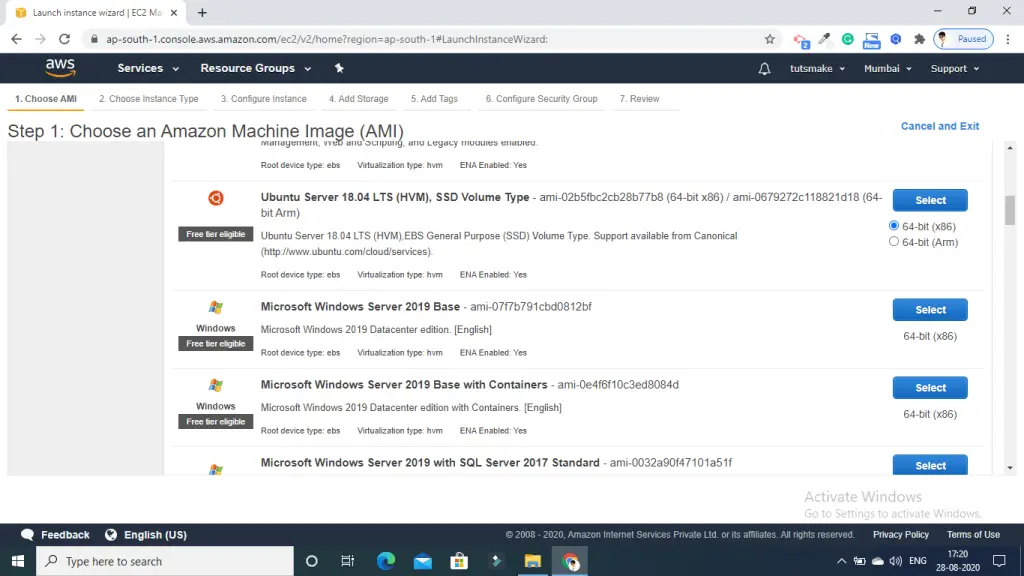
Step 3: Choose AMI
In this step, choose AMI according to your need. Here, we will choose Ubuntu server 18.04 LTS – SSD Value Type.
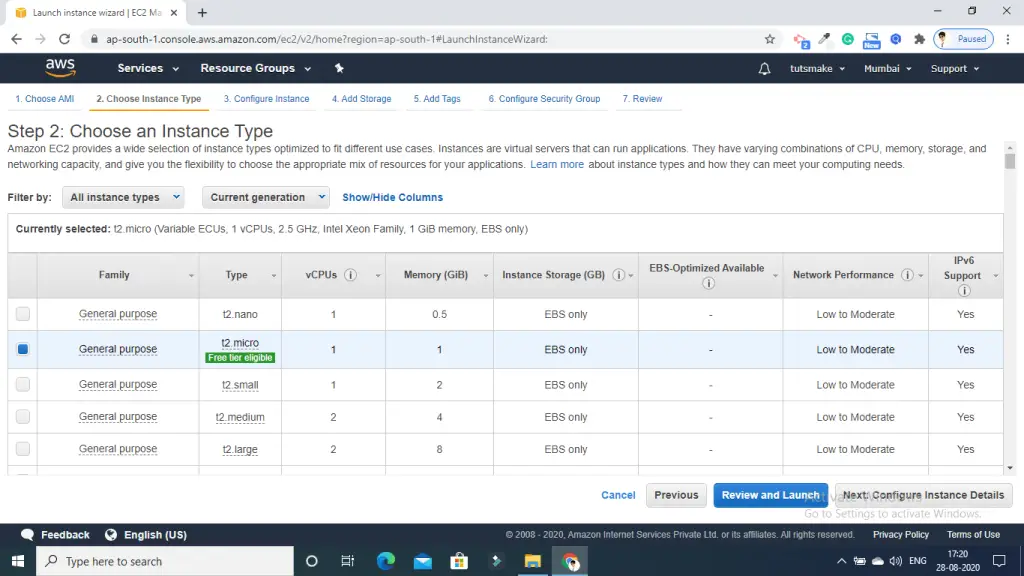
Step 4: Choose EC2 Instance Types
In this step, choose ec2 instance type shown in below picture:
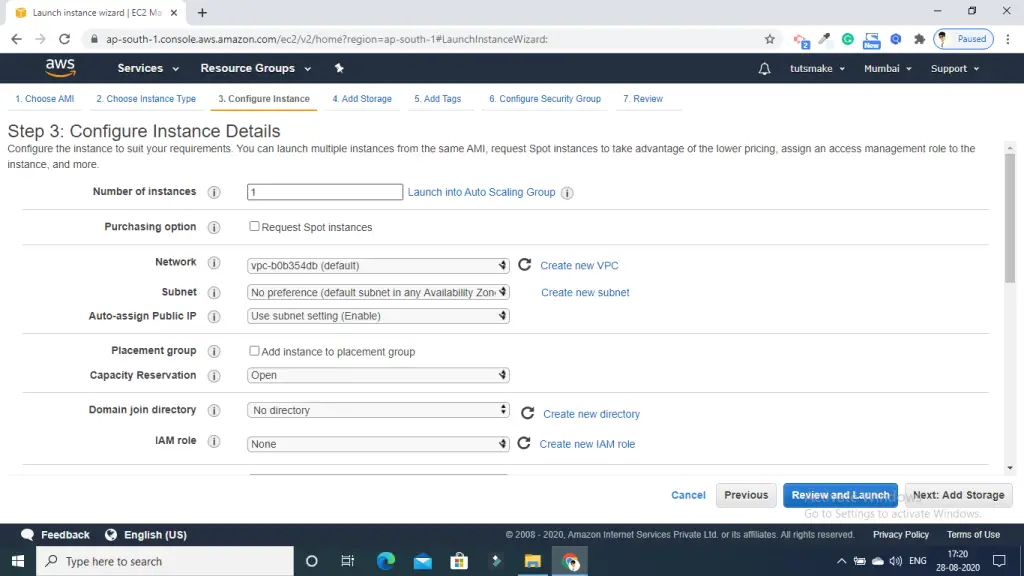
Step 5: Configure Instance Details
In this step, you need to configure your instance. Like below given picture:
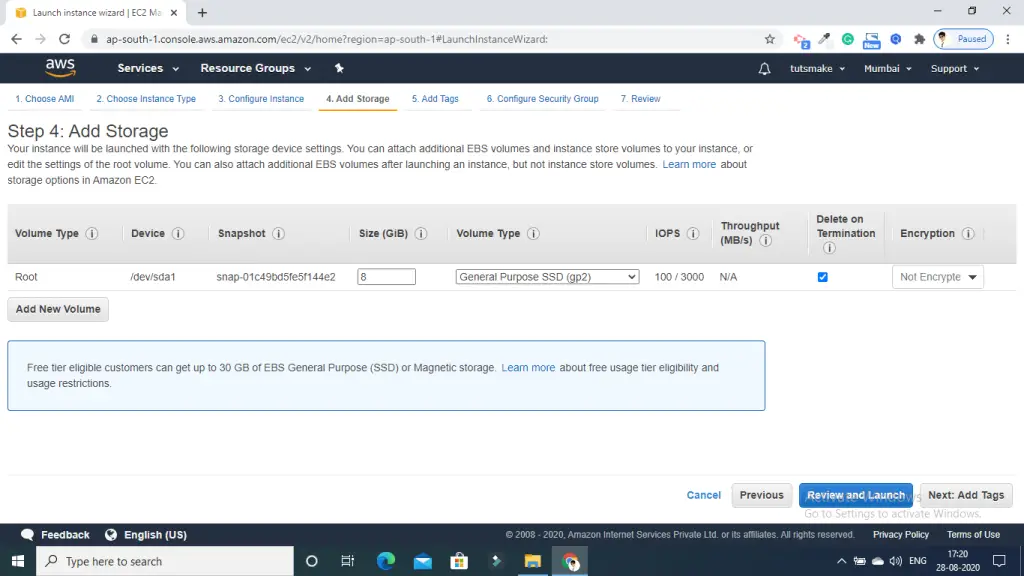
Step 6: Add Storage of Ec2 Intance
In this step, choose storage. By default ec2 t2-micro provides 8gb ssd. But you can change it according to your need. Shown in the below picture:
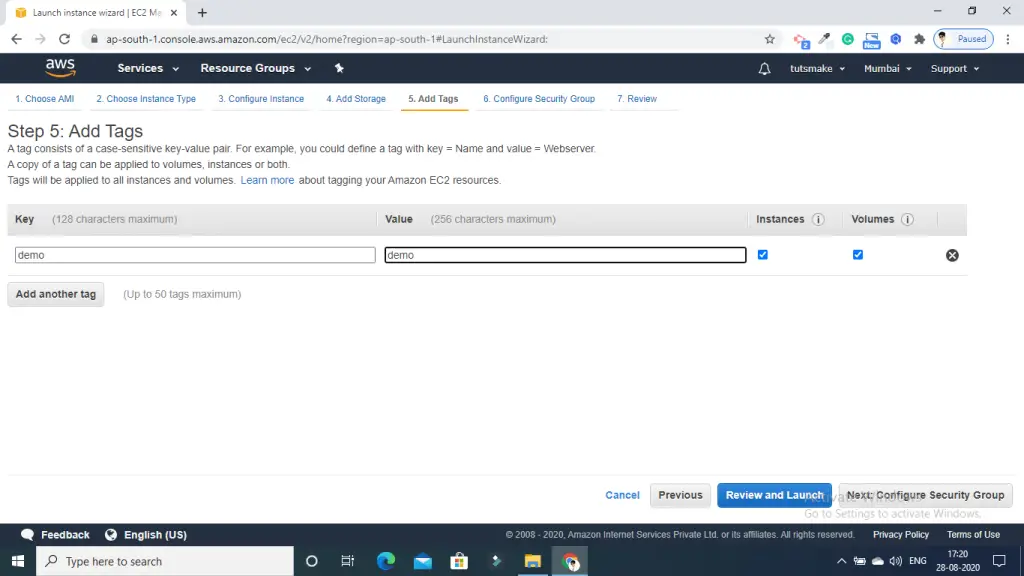
Step 7: Tag Instance of Ec2 Instance
In this step, you need to add tag of instance with a key-value pair.
Like below given picture:
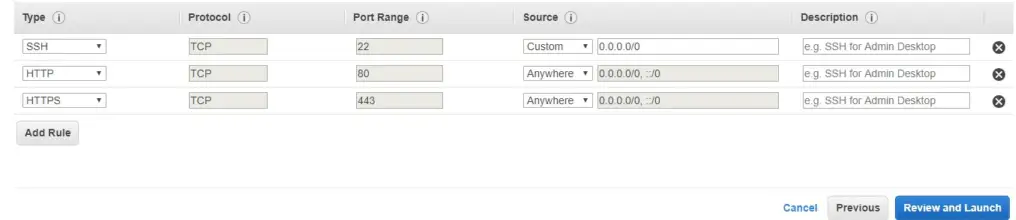
Step 7: Configure Security Groups
In this next step of configuring Security Groups, you can restrict traffic on your instance ports.
- Creating a new Security Group
- Naming our Security Group for easier reference
- Defining protocols which we want enabled on my instance
- Once, the firewall rules are set- Review and launch
Step 9: Review Instances
In this step, you need to review all settings and parameters. Then click on launch button:

Step 10: Create Key-Pair For Intance Access
In this step, you will be asked to create a key pair for login into your aws instance. A key pair is a set of public-private keys.
So, create new key pair and add the name of this key. Then download and save it in your secured folder.
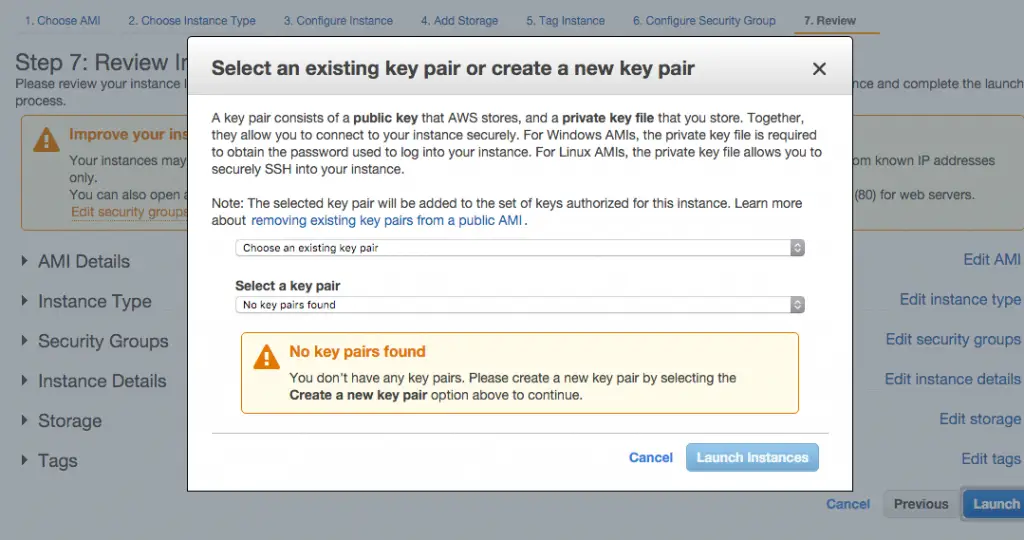
Click on the Launch instances button to launch your instance. And wait a few minutes to completely launch your instance or web server.
Step 11: Type Ec2 Instance Public Ip On Browser
Next, click on ec2 dashboard and look for the Running Instances option under the main menu and also click on it.
Then, you’ll notice it lists the instance’s public IP under its details.
Thanks for reading this post on how to create ec2 instance in aws step by step.