Connect aws ec2 instance. In this tutorial, we will show you two ways to connect your aws ec2 instance using putty and ssh terminal for Windows, mac, and linux user.
Connect aws ec2 Instance using Putty and SSH Terminal
Here are two ways to connect your aws ec2 instance using putty and ssh terminal for Windows, mac, and linux user:
- Connect to EC2 Instance SSH Mac OS & Linux
- Connect to EC2 Instance using Putty (pem file) Windows
Connect to EC2 Instance SSH Mac OS & Linux
First of all, you need to change the PEM file permission. And need to set it 400.
So, Open your terminal and run the below command to change the permission
chmod 400 **/path/to/your/key/filename.pem
Next, Run below command to connect with EC2 instance
ssh -i /path/to/your/key/filename.pem ubuntu@ipaddress
Here ubuntu is the default usrename created by aws. Change IP address string with your ipaddress. You can find this under EC2 instance.
Connect to EC2 Instance using Putty (pem file) Windows
In this way, first of all, you need to install putty into your windows system. So visit the following url https://www.putty.org/ and download and configure putty in window.
1. Converting .pem file to .ppk file using puttygen
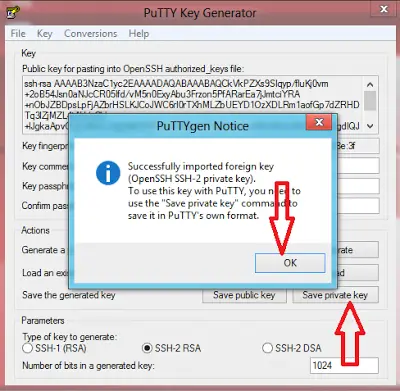
Now, Open puttygen.exe and load the private key (pem file). You was got, When you created the instance ec2 instance .
So click on load buttuon and save the .ppk file in any folder as you want.

2. Connecting to Ubuntu using SSH client putty
So go to window navigation bar and search putty. And click on putty software.
After that, one popup window will open.
Now, type host name or IP (public or elastic ip) as shown in the below picture:

Then navigate to connection–>data and type in the add user name.
User name differs for different instance types.
- For Ubuntu the default user name is ubuntu
- For RHEL and Amazon Linux instance the default user name is ec2-user
- For SUSE instance the default user name is root.

After that, navigate to SSH–>Auth click on Auth. And load the .ppk file you generated using puttygen in above steps.

Finally, Click open button and connection will be established. The putty terminal shown is a connection established using username “ubuntu“.
Thanks for reading this post, now you have successfully connected with the EC2 instance.
